To launch your Shopify store, you need to sign in for associate account.
1. Sign Up with Shopify
1. Sign in with Shopify
Visit Shopify.com. Use the signup kind to form associate account.
Enter the desired details and click on the ‘Start free trial’ button.
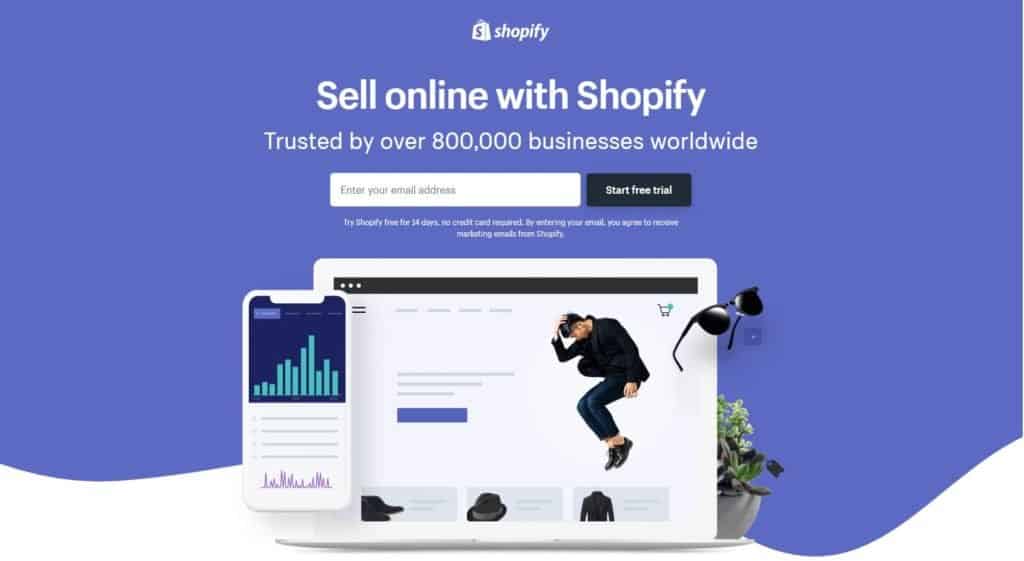
Your store name must be distinctive or Shopify can raise you to settle on one thing else.
After this primary screen, you’ll be asked for a couple of a lot of details, as well as your name, address, country, and make contact with range.
You will even be asked if you've got merchandise and, if so, what you aim to sell. If you’re simply making an attempt out Shopify to examine if it works for you, you'll choose ‘I’m simply taking part in around’ within the ‘Do you've got products?’ dropdown, and ‘I’m not sure’ within the ‘What can you sell?’ section.
Once complete, click ‘I’m done’.
2. Start Setting Up Your Online Shop
After you’ve signed up, you’ll be directed straight to your store admin screen. currently you're able to begin customizing your store, uploading merchandise, and fitting payments and shipping.
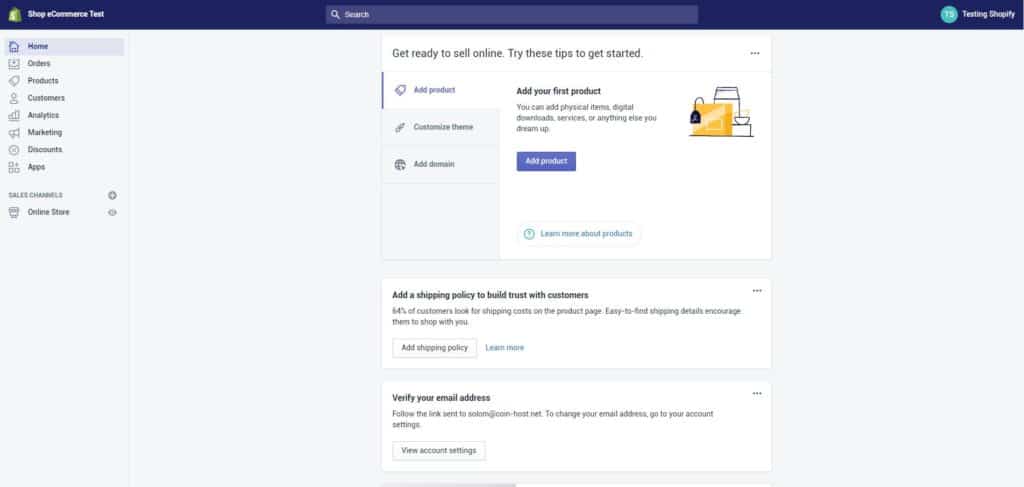 Your home admin screen tells you all you need to know to get you up and running.
3. Choose a “Theme” or a “Layout”
Shopify has its own official theme store. These themes square measure all sure to have full support from the designers thus you recognize that your store is in smart hands.
All themes go with a comprehensive list of modifications you'll build while not having to the touch a line of code. The premium themes go with a lot of modifications, however you'll conjointly attain a good trying website with a free one. These changes square measure printed within the next section.
If you would like to create wholesale changes to a topic, there square measure only a few limitations on what is achieved by accessing the hypertext mark-up language and CSS. Don’t worry if you haven’t got any writing expertise. Shopify has a world team of style agencies they decision ‘Shopify Experts’ that you simply will rent to totally customise your website.
To find a topic that suits your desires, we have a tendency to advocate the following:
1. Browse the Theme Store
Log into Shopify and visit the Shopify Theme Store at themes.shopify.com. You’ll notice over seventy theme variations to settle on from, as well as an honest choice of free ones.
You also may notice Shopify themes on different Marketplaces, like TemplateMonster one.
Just opt for, category, options to select your theme.
You can filter by paid or free, industry, and options. you'll conjointly kind themes by worth, popularity, and most up-to-date.
Shopify theme choice
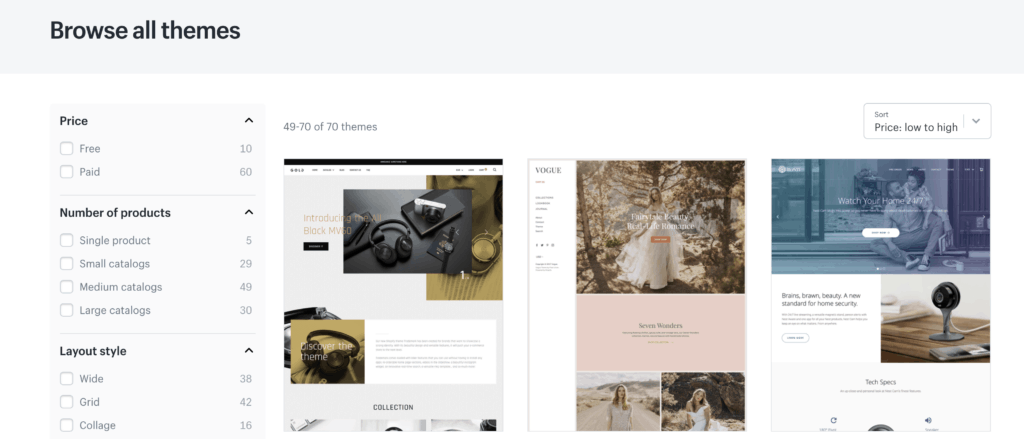
The Shopify Theme Store.
2. Check the Functionality and Reviews
Once you’ve found a topic you prefer, click on the theme’s sample image. You’ll be a lot of info concerning the theme, like whether or not the theme is responsive/mobile prepared among different options.
Scroll right down to scan some reviews concerning what different e-tailers mistreatment the theme think about it.
3. Preview the Theme
To see the theme in action, click read Demo. You’ll see this below the inexperienced ‘Preview Theme in your Store’ button.
If the theme comes in a very vary of designs, you'll conjointly read demos of the various designs by clicking on them.
4. Get the Theme
Once you’ve found a topic you prefer, click the inexperienced button.
Shopify can raise you to substantiate that you simply wish to put in the theme.
Click Publish as my Shop’s Theme.
Don’t worry if you’re not 100 percent certain it’s the correct theme for you. you'll continually amendment your mind later.
After the theme has put in, Shopify can allow you to grasp and can provide you with the choice to travel to your Theme Manager.
Your theme manager shows printed themes (the one you put in or activated most recently) and unpublished themes below (previously put in themes).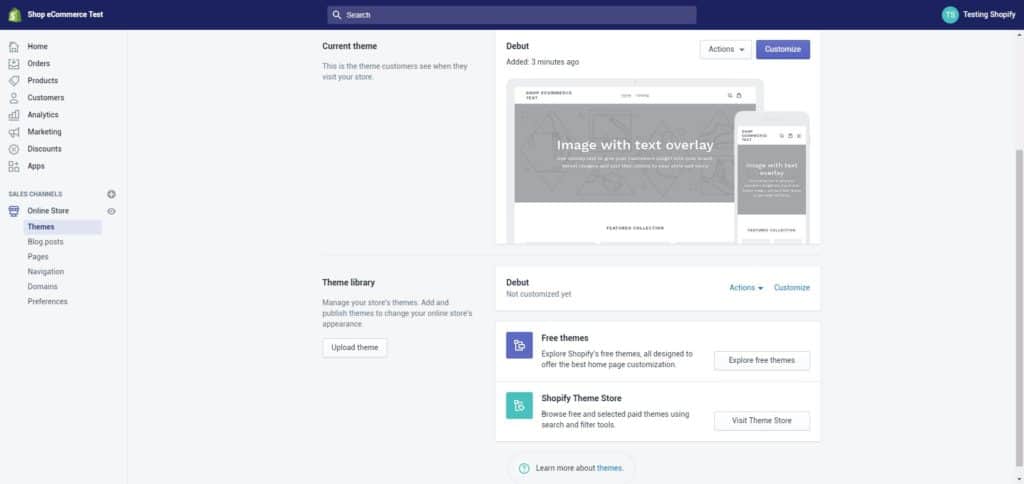
4. Edit Shopify Settings
The majority of Shopify themes permit you to create easy amendments which will massively change the looks of your store, thus you'll rest assured knowing you won’t find yourself with a web site that appears sort of a a dead ringer for thousands of different stores

These stores are all built using the same theme.
On your admin screen, choose ‘Themes’ from the left navigation menu. On this page you may see your live theme in a very box at the highest, within the prime right corner of that box are 2 buttons. the primary one is of 3 dots, which provides you some basic settings changes. one in all these permits you to create a reproduction of the theme. we have a tendency to extremely advocate you are doing this just in case you create some changes you don’t like, you'll delete the duplicate and begin once more.
The second button says ‘Customize Theme’. If you click it, you may be taken to a page that controls all the fundamental practicality of your store. this is often a good time for you to possess a radical play with the settings and take a look at out all the options thus you'll verify what your website is capable of.
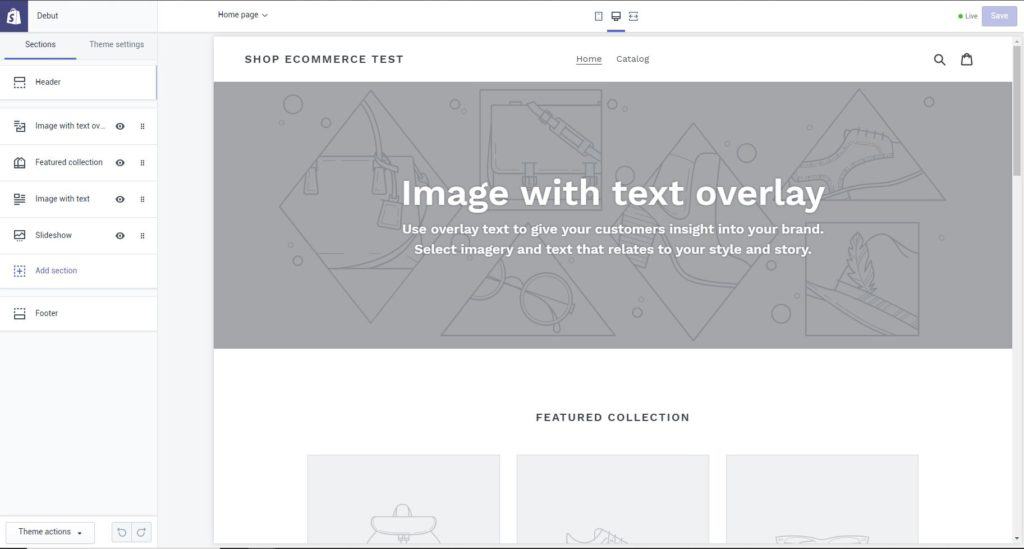
Your themes in custom settings.
The most common features will include:
- Uploading logos
- Uploading slides to a homepage carousel
- Adding related item functionality to product pages
- Choosing how many items appear on each line of the collection pages
- Color schemes
- Font choices.
Some themes will permit you to reposition components on pages like showing product pictures on the left, right or center of the page. you'll conjointly opt for whether or not you would like to show social like/tweet/pin/+1 buttons.
5. Add Your Products to The Store
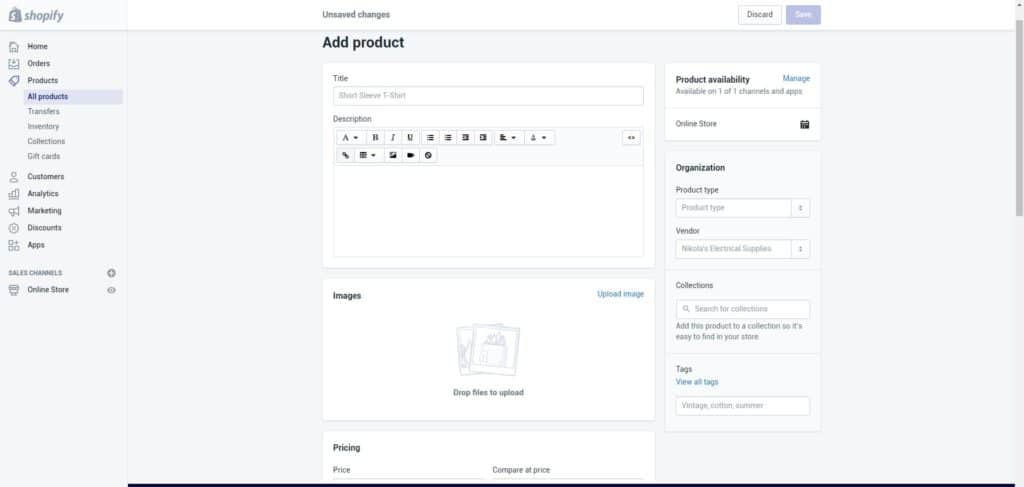
Navigating the bar on the left choose ‘Products’. you'll then see a blue ‘Add a product’ button within the middle of the page. Use the subsequent screen to feature the maximum amount detail PRN concerning your product. particularly investigate those who can facilitate with SEO like name, description, and URL. embrace as several details as potential to assist inform the purchasers concerning your things.
This is the screen wherever you transfer product footage. Once the pictures square measure uploaded, you'll set up them therefore don’t worry concerning uploading them in any specific order.
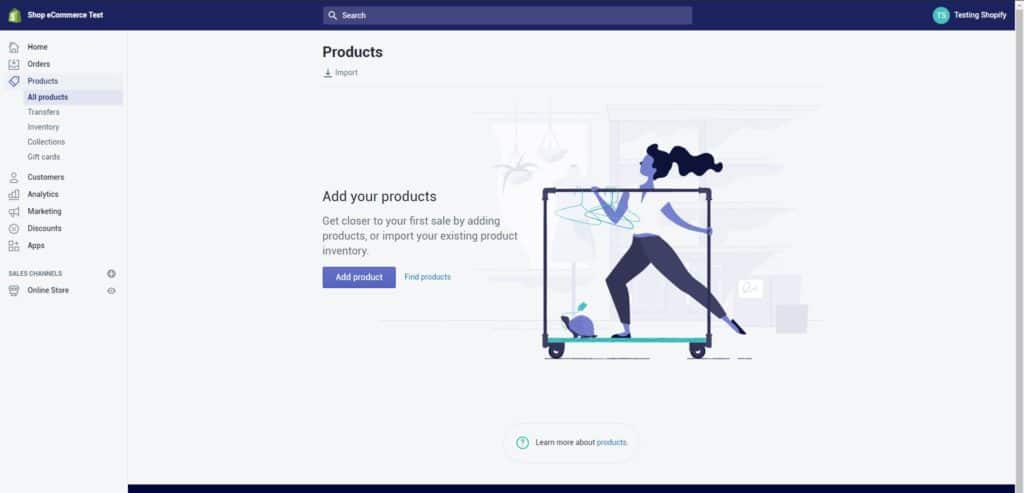
The Product screen. Make sure you fill out as much information as possible.
Product pictures will create a buying deal therefore ensure you show your merchandise off to their best and highlight any special or distinctive options with clean up photos. to stay your store trying tidy, we recommend you retain all pictures a similar dimensions. Unless you intend to create your assortment pages appear as if a Pinterest board.
Once everything is stuffed out, forever bear in mind to click the ‘Save product’ button within the prime and bottom right corners.
Set Up Collections (Groups of Products)
A collection is any cluster of merchandise that have some options in common that customers would possibly seek for once visiting your store. for instance, your customers may be looking for:
Clothes specifically for men, women, or kids
Items of an explicit sort, like lamps, cushions, or rugs
Items on sale
Items in bound sizes or colours
Seasonal merchandise, like vacation cards and decorations.
Products will seem in any variety of collections. Usually, you'd show your collections on your homepage and within the navigation bar. This helps customers notice what they’re trying to find while not having to click through your whole catalog.
The Collection set up screen works in exactly the same way as the Product screen
Manual and Automatic Collections
When you add a brand new assortment, you'll be able to choose however product ought to be additional thereto. These area unit the 2 options:
Manually -
You add and take away product during a manual assortment separately.
Automatically -
You will established choice conditions to mechanically embrace product that meet bound criteria.
Before your site can go live, you need to add a few more details about your company and how you plan to make deliveries and pay tax.
General
Make sure all your business information is filled out in the bottom left settings area. Make sure to use the Google Analytics feature. This can prove to be an invaluable source for tracking your store visitors.
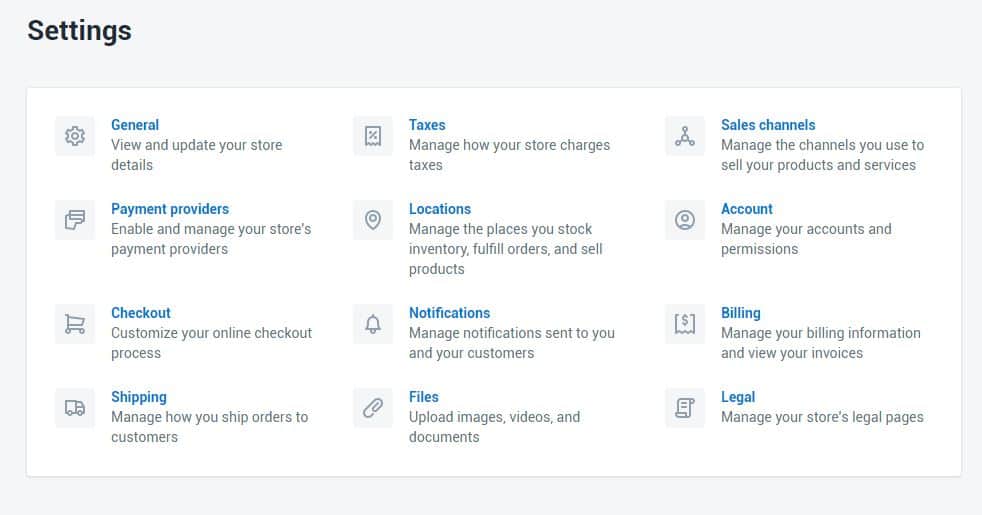
Taxes
- Go to the Products page of your admin panel.
- Click on the name of a given product.
- Scroll down to the section called “Variants”.
- Make sure the checkboxes next to Charge taxes and Requires shipping are checked if you need to include these with your products.
- Some stores won’t need to charge taxes or shipping on products like digital goods. On the other hand, a T-shirt store will likely need to charge both.
- If you are planning to ship your product to customers, make sure to enter the product’s weight in the appropriate field.
7. Add a Domain Name
To get your site live you’ll need a domain name. You have two choices.
Firstly you can buy a domain from Shopify and it will be added to your store automatically. This saves you time, especially if you have no knowledge about hosting a website. These domains typically cost $9-$14 USD per year. Your second option is to purchase a domain from a third party such as GoDaddy. These domains start from $10.00 USD a year. The downside is that you’ll have to redirect the DNS records yourself which can seem daunting at first.
If you’re unable to come up with a good domain name, read our tips on how to choose a good domain name.
Here are the steps to put your new Shopify store live on a third party domain name.
- Add the new domain in Shopify
In the Shopify admin, on the left navigation go to Settings and then Domains and add your domain name using the ‘Add an existing domain’ button.
- Update DNS records
Login to your domain registrar and make the following changes to the DNS records:
- Replace the @ or main A record with the following IP address: 23.227.38.32
- Add or replace the www CNAME with storename.myshopify.com (i.e. your store Shopify link without the HTTP, which you can see on the domains settings page)
- Remove any storefront passwords
Otherwise, no one will be able to access your site even when it’s live.
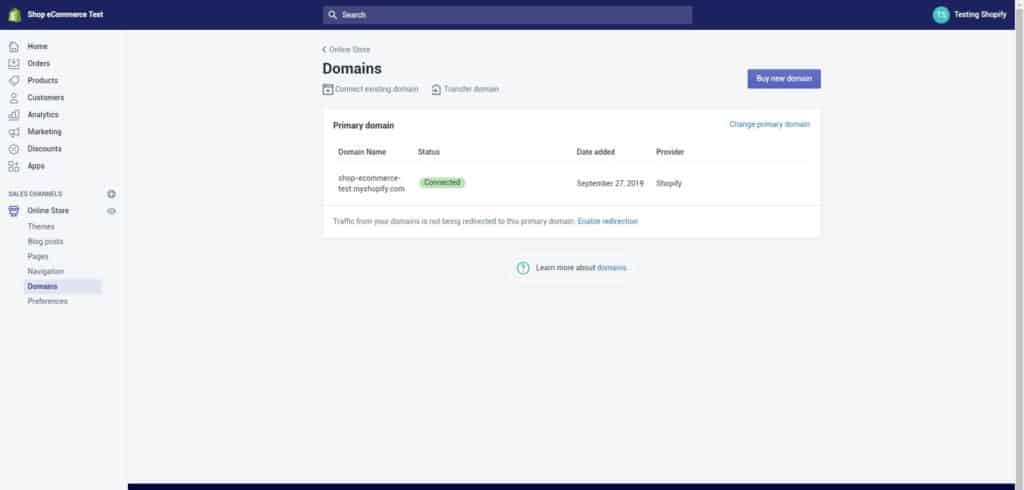
- Set as primary if relevant
Whilst in Online Store > Domains, you can choose your main domain by using the drop-down at the top of the screen:
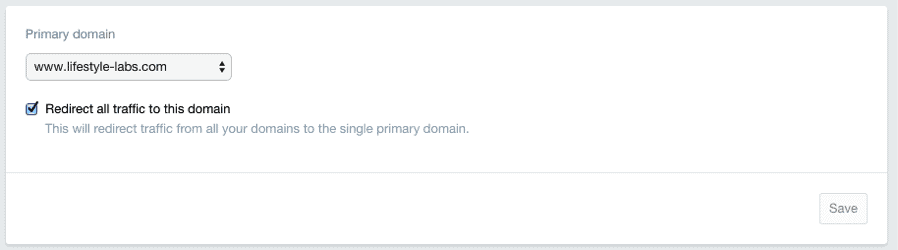
Ensure that you also check the ‘Redirect all traffic to this domain’. This means that traffic to all other domains will be directed to your primary domain. This is crucial for good SEO.
- Adding other domains
You can repeat steps 1 and 2 with other domain names you own. All domain names will redirect to the ‘Primary’ domain, which you can change at any time with the ‘Set as primary’ option next to each domain name.
Note that the number of domain names you own has no influence on SEO.